Summary
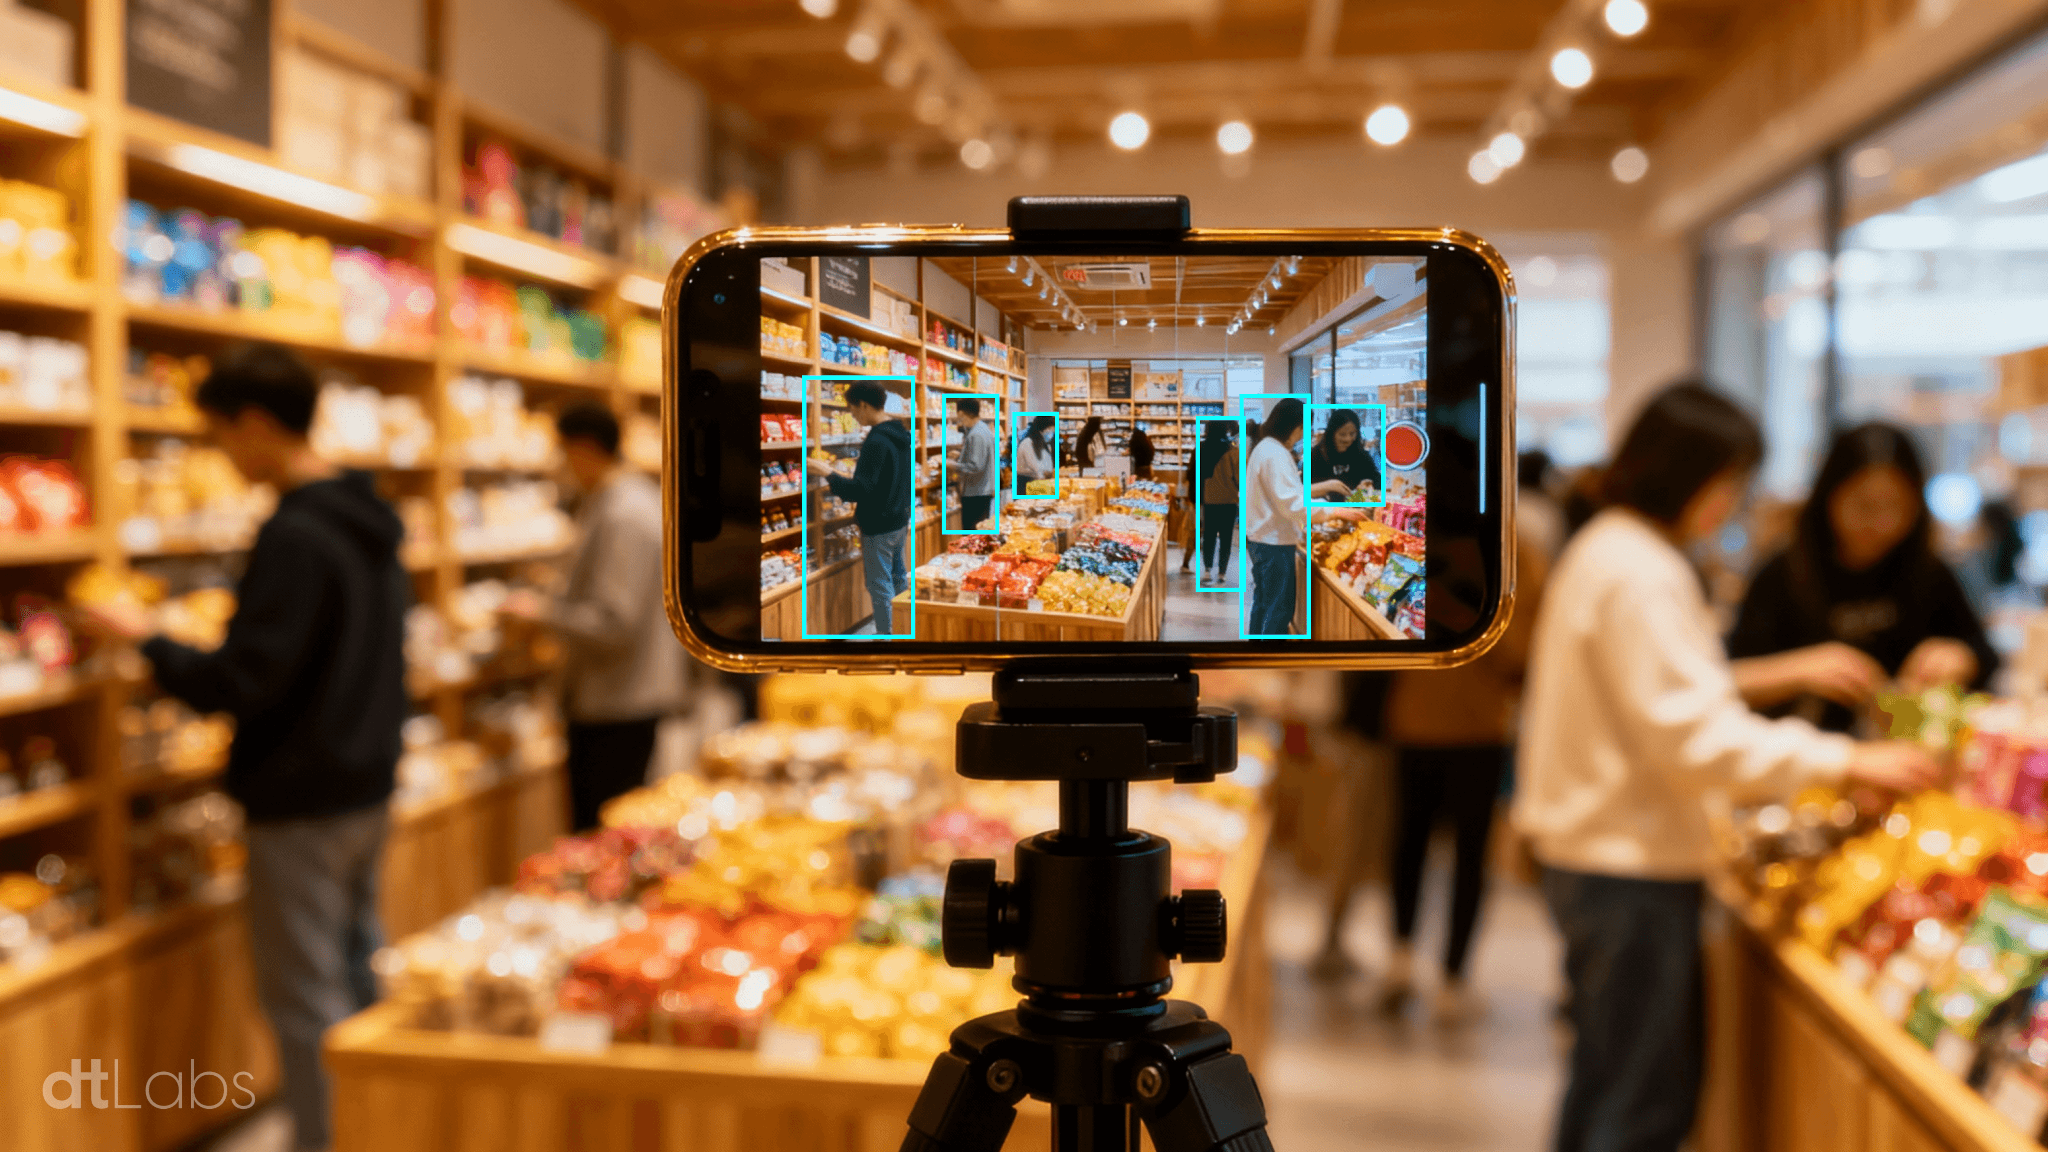
Detecting unauthorized loitering in commercial and private environments is a crucial challenge for organizations seeking both security and operational efficiency. The presence of people lingering in key areas—such as parking lots, store entrances, or restricted zones—without a clear purpose can increase the risks of theft, vandalism, or other crimes. In addition to these direct threats, the perception of insecurity can shake customer confidence, damage brand reputation, and ultimately impact revenue.
Traditional methods for addressing loitering often fall short, primarily because they rely on manual surveillance or simple automated rules. Security teams responsible for monitoring multiple cameras may get distracted or fatigued, while basic motion detection systems often interpret innocent behavior as suspicious. This leads to a high number of false alarms, overloading resources and reducing the effectiveness of security responses.
Artificial intelligence, however, represents a transformative opportunity for loitering detection. Edge AI platforms and computer vision systems like AIOS by dtLabs enable continuous monitoring of strategic areas using your existing camera infrastructure. Machine learning models analyze images in real time, identifying when individuals or groups remain beyond pre-defined limits.
With AI-powered solutions such as AIOS, organizations receive real-time alerts, allowing for faster and more effective intervention—whether by human teams, automated audio messages, or direct escalation. The analytical reports generated by AI further help refine risk zones and optimize team allocation, creating a safer environment without impacting legitimate activities.
In this article, we’ll walk through, step by step, how to implement and customize a loitering detection workflow using the AIOS platform, turning this innovation into practical value for your business.
To follow this tutorial, you’ll need access to AIOS and an AIBox, as well as an IP video source (an RTSP stream) that can be connected to the platform and shows the scene to be monitored. However, even without access to the system, you’ll quickly understand the usability and flexibility of our software.
Pipelines and Components
AIOS works with the concept of Components and Pipelines. A component performs a simple task, such as receiving video from a camera, detecting an object, counting how many times an event occurs, or identifying changes in an image area. A pipeline is a set of interconnected components that capture and process images for a specific purpose.
All work on AIOS takes place in a pipeline. So the first thing we need to do is create one. In the AIOS interface, select the Pipelines item on the left-hand toolbar, then click the +Add Pipeline button in the upper right corner.
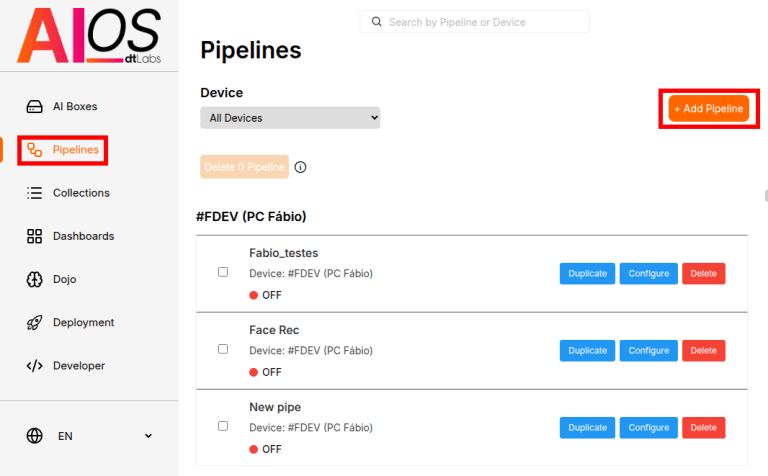
In Pipeline Name, enter a descriptive name and in Device, select the device (AIBox) where the pipeline will be created. Click Create Pipeline. The next screen displays a preview of your pipeline and a visualization of the results. Since the pipeline is newly created, both areas are empty. Click the Edit button at the top of the screen to start building your pipeline.
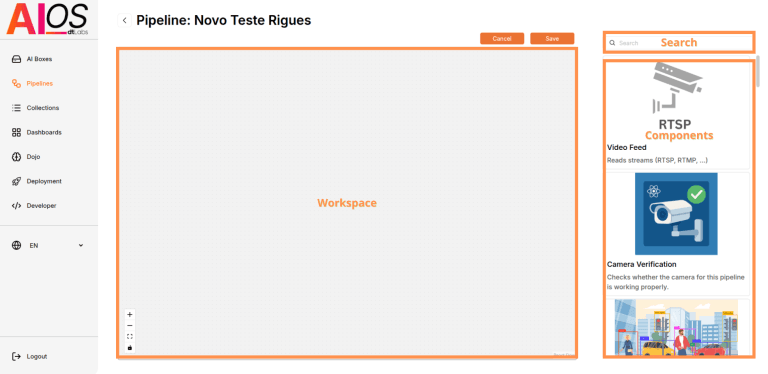
Let’s take a minute to get familiar with the pipeline creation interface. On the right, there’s a list of components we can use to build a pipeline. The large empty space in the center is your workspace, where you’ll configure and connect your pipeline’s components.
Receiving Video
The first component we’ll use is the Video Feed. This is the fundamental component of any AIOS pipeline—it defines the video source we’ll use for detection. Simply click the component on the list to the right and place it anywhere in the workspace.
Video Feed has some parameters to configure. Name is optional and can be used to identify the component, for example “Entrance_Camera.” URL is the URL of the camera’s video stream to be used for detection, for example: rtsp://admin:password@192.168.15.100:554
In this URL, admin and password are the username and password needed to access the stream. After the @ is the camera’s IP address (in this example, 192.168.15.100) and port (554). Note that these are just example values—you must enter the actual information for your camera.
In FPS, set how many frames per second should be processed during detection, between 1 and 10. The higher the FPS, the greater the processing demand on your AIBox. Most solutions, including loitering detection, do not require a high frame rate, so we can use 5.
The Resolution parameter sets the resolution of the frames to be processed. Again, the higher the resolution, the greater the processing demand. In most cases, the default resolution, 640×480 pixels, is sufficient.
Under RTSP-format, specify the format (codec) used by your camera in the video stream, e.g., h264. No other values need to be changed for now. Your Video Feed component should look like this:

Detecting Persons
The next pipeline component is the Person Detection, which does exactly what its name suggests: it detects persons in the images sent by Video Feed. Except for the Name (optional), the only parameter for this component is Confidence threshold, which determines the level of “certainty” the model must have before marking something in the video as a person. We’ll use the default value, 0.35.

One important step is still missing in our pipeline. We have a video source and person detection, but they are not connected. This connection is necessary to define who sends or receives data from whom.
Notice that the left and right edges of the Video Feed component have an orange circle. This circle also appears at the left and right edges of the Person Detection component. To connect the components, just click the circle on the right of Video Feed and drag it to the circle on left of Person Detection. A dashed line will appear, showing the connection between them.

The next component is Loitering, which detects the presence of an object in a defined area for a set period of time. Since we’re combining it with the Person Detection, this means only people in the marked area for a specific period will be detected. Don’t forget to connect it to Person Detection.
The main parameter for this component is the area where detection will take place. To define it, we need to grab an image from the Video Feed component. Save your pipeline by clicking the Save button at the top of the screen. You’ll be taken to the pipeline visualization screen. Run it by clicking the Play (▶) button at the top of the screen and wait a few seconds until an image from the camera appears in the Visualization area.
Now stop the pipeline by clicking the Stop (⏹) button and return to the editor by clicking Edit. Click the pencil to the left of the Loitering component’s title. In the window that appears, left-click to mark the area where detection should occur, then click Save.

In addition to the area, another important parameter is the Time to Notify, which is specified in seconds. Enter a value (between 1 and 10).
With this, we can now detect the presence of people in a specific area for a set period of time. But what do we do when this detection occurs? We can generate an alert, such as a WhatsApp message to a person in charge.
Generating Notifications
To do this, use the WhatsApp component. The parameters are simple:Phone number is the number that will receive the message. It must be in the format +COUNTRYCODE_AREACODE_NUMBER. In our example, we will send a message to the phone number 12345 6789 in São Paulo (Area Code 11), in Brazil (Country Code 55), therefore, we use +5511123456789.
You can also set a custom message (e.g., Loitering detected!) and send an image from the scene with the message. The last parameter to define is the Time Between Notifications interval, in seconds. Imagine you set it to 10 seconds. This means that, while a person remains in the marked area, a message will be sent every 10 seconds alerting you to the presence.

Sending notifications to WhatsApp is just one example. You can send them to a Kanban board, for instance. AIOS also integrates with PLCs (programmable logic controllers), making it possible to generate a signal to turn on a light or sound an alarm whenever detection happens.
Our loitering detection and notification system is complete! If you prefer, you can watch this tutorial in the video below (audio in Brazilian Portuguese):
Conclusion
Of course, loitering isn’t the only thing you can detect with AIOS. You can detect the use of PPE (Personal Protective Equipment) by your employees, intrusions into restricted areas, calculate the volume of objects (volumetry), to implement automated access control and much more. It is impossible to list all possibilities in a single article.
The flexibility of AIOS makes it a comprehensive and versatile platform in the field of edge AI and computer vision. With its ability to serve multiple sectors—from industry to logistics, security to smart cities—AIOS offers innovative applications that transform visual data into actionable insights and tangible results, without the need for technical experience.
Count on AIOS to accelerate your digital transformation journey, and discover why we have satisfied clients in more than 15 countries.